Add Applications
This guide explains how to add applications in SmartLink.
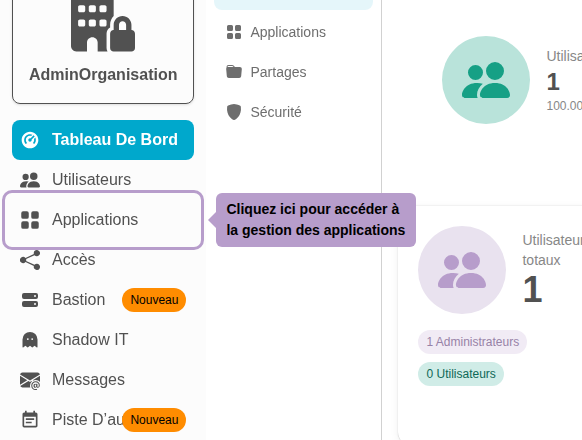
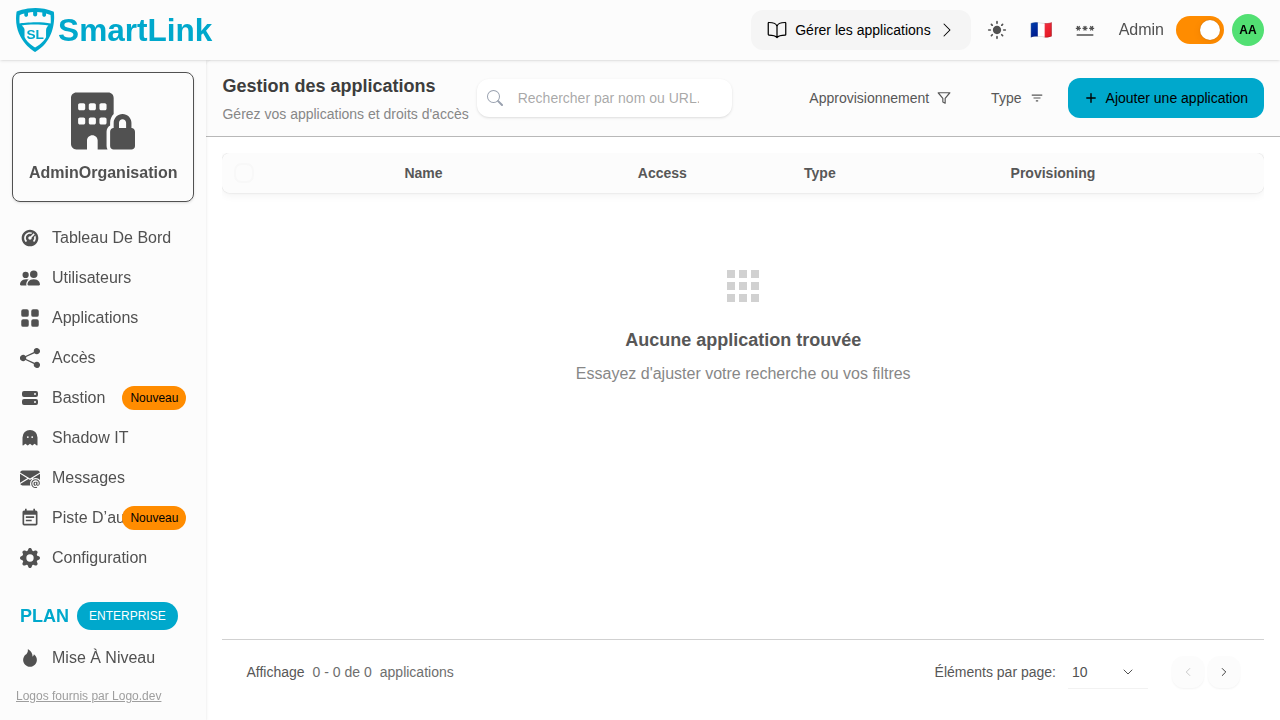
Step 1: Access the application management
From the admin menu, click on Applications.
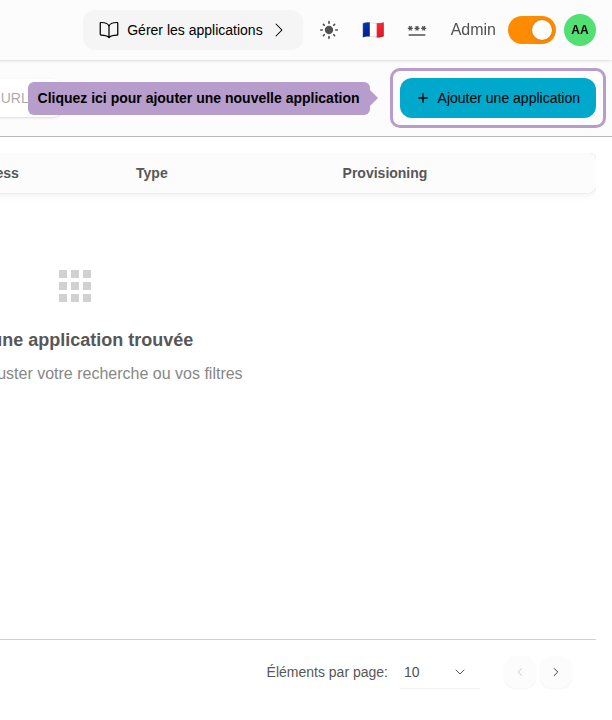
Step 2: Open the add page
Click on the "Add an application" button in the toolbar to access the creation page.
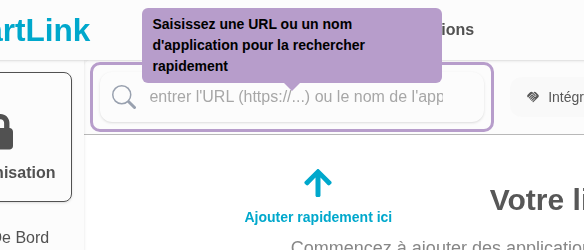
Step 3: Use the quick search bar
Enter a URL or an application name in the quick search bar at the top of the page.
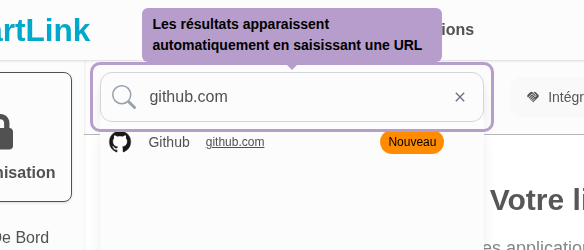
Step 4: Add an application by URL
Enter the application's URL (e.g., https://github.com). SmartLink automatically retrieves the application information.
Click on the application in the list to add it to your waiting list.
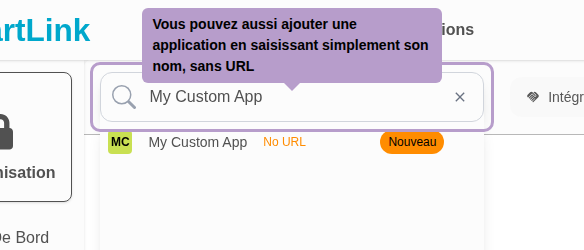
Step 5: Add an application without URL
You can also add an application by entering only its name, without a URL.
Step 6: Check the waiting list
The added applications appear in the waiting list (Shopping List). You can add more before confirming.

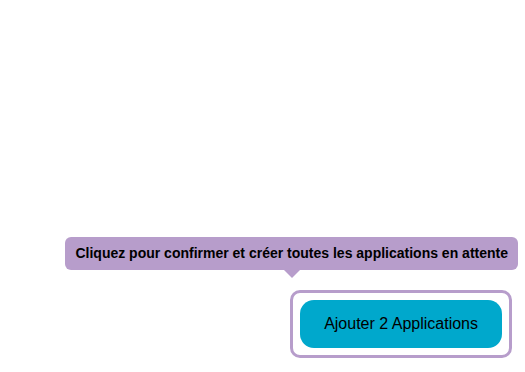
Step 7: Confirm adding applications
Click on the "Add # Application(s)" button to create all pending applications.
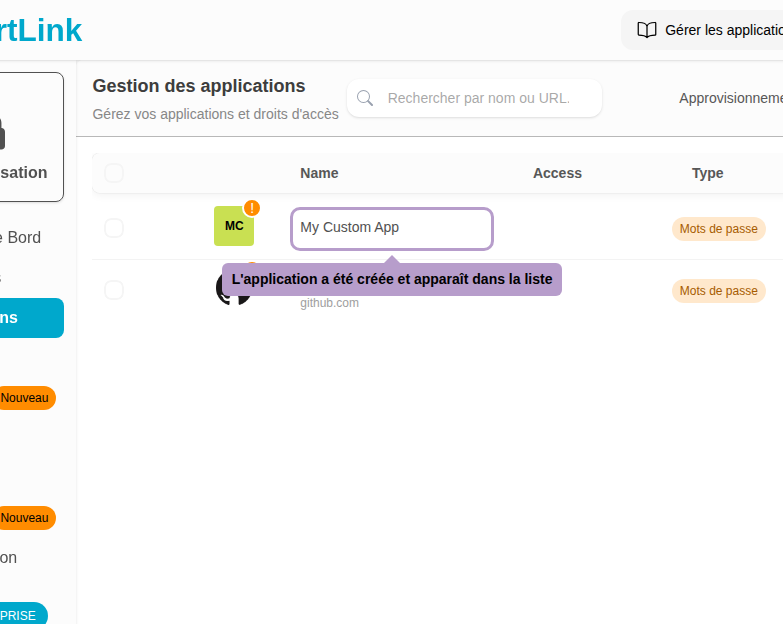
Step 8: Verify that the applications have been added
You are redirected to the application management page. The new applications appear in the list.
Other options: App Store
Click on the App Store button to browse the SmartLink App Store catalog and add applications with one click.

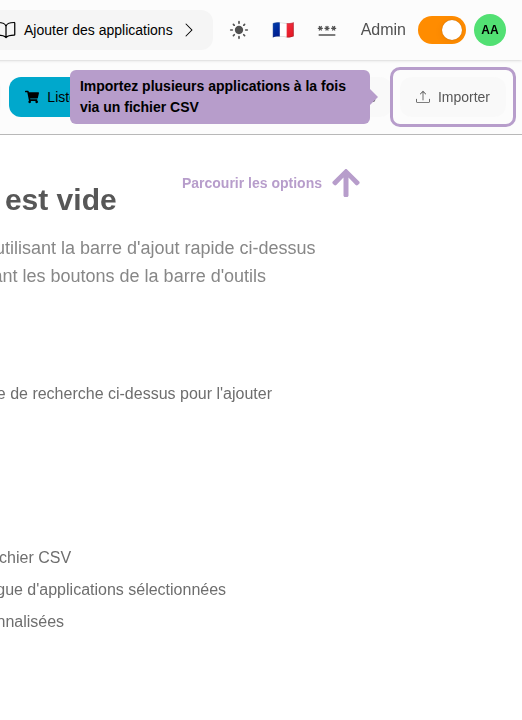
Other options: Import
Click on the Import button to add multiple applications at once via a CSV file.