Provisioning SCIM
SCIM provisioning (System for Cross-domain Identity Management) allows SmartLink to automatically synchronize user accounts and groups with your external applications. Connect SmartLink to your target application once, then manage everything from SmartLink.
Accessing the Provisioning Tab
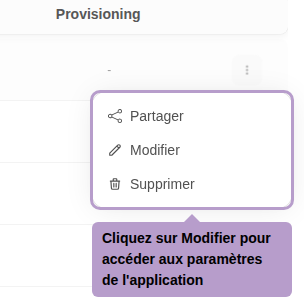
From the list of applications, open the actions menu, then click on Edit.
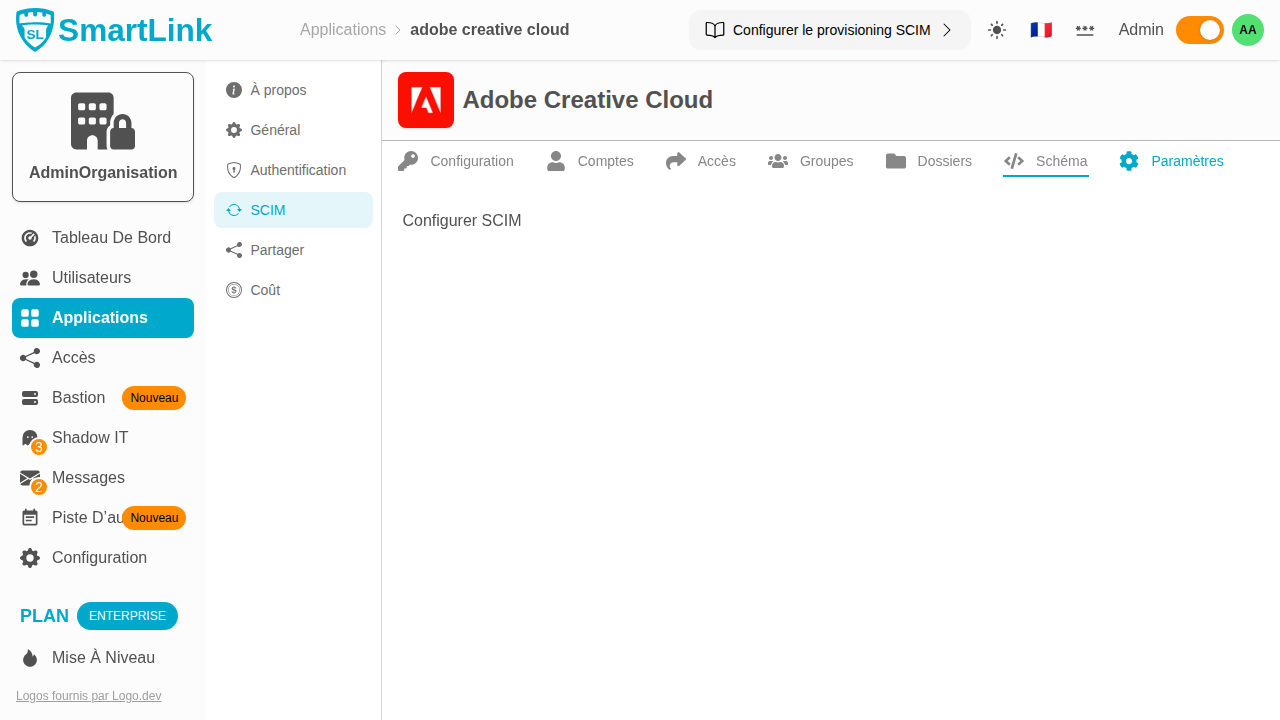
On the application page, select the Provisioning tab. You will discover seven management sub-tabs:
| Tab | Role |
|---|---|
| Configuration | Connect SmartLink to the SCIM endpoint of the target application |
| Accounts | View and manage existing accounts in the target application |
| Access | See SmartLink users who have access to this application |
| Groups | View and manage groups in the target application |
| Folders | View SmartLink folders associated with this application |
| Schema | Explore the SCIM schema returned by the target application |
| Settings | Configure provisioning/deprovisioning automations |

Configuring SCIM Connection
Enter the base URL of your application's SCIM endpoint and the associated authentication token, then click Save.
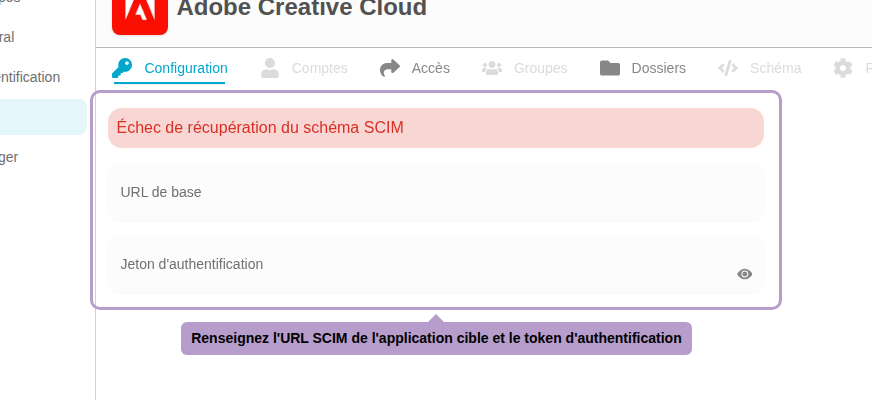
Once the connection is established, SmartLink retrieves the SCIM schema and unlocks the other tabs.
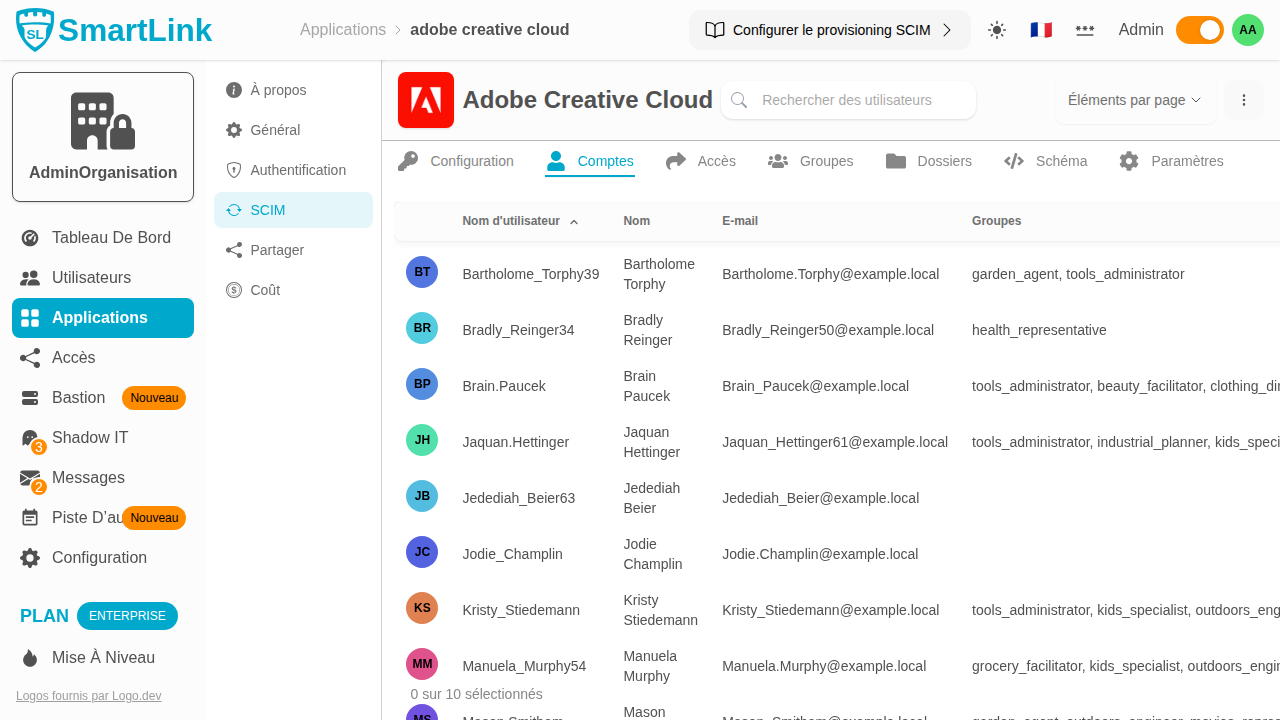
Accounts
The Accounts tab displays all accounts present in the target application. For each account, an icon indicates if a SmartLink user is associated with it.
Available actions in the menu of each row:
| Action | Description |
|---|---|
| Create a membership | Create a new SmartLink user from the SCIM account data |
| Associate a membership | Associate an existing SmartLink user with this account |
| Delete | Delete the account in the target application |
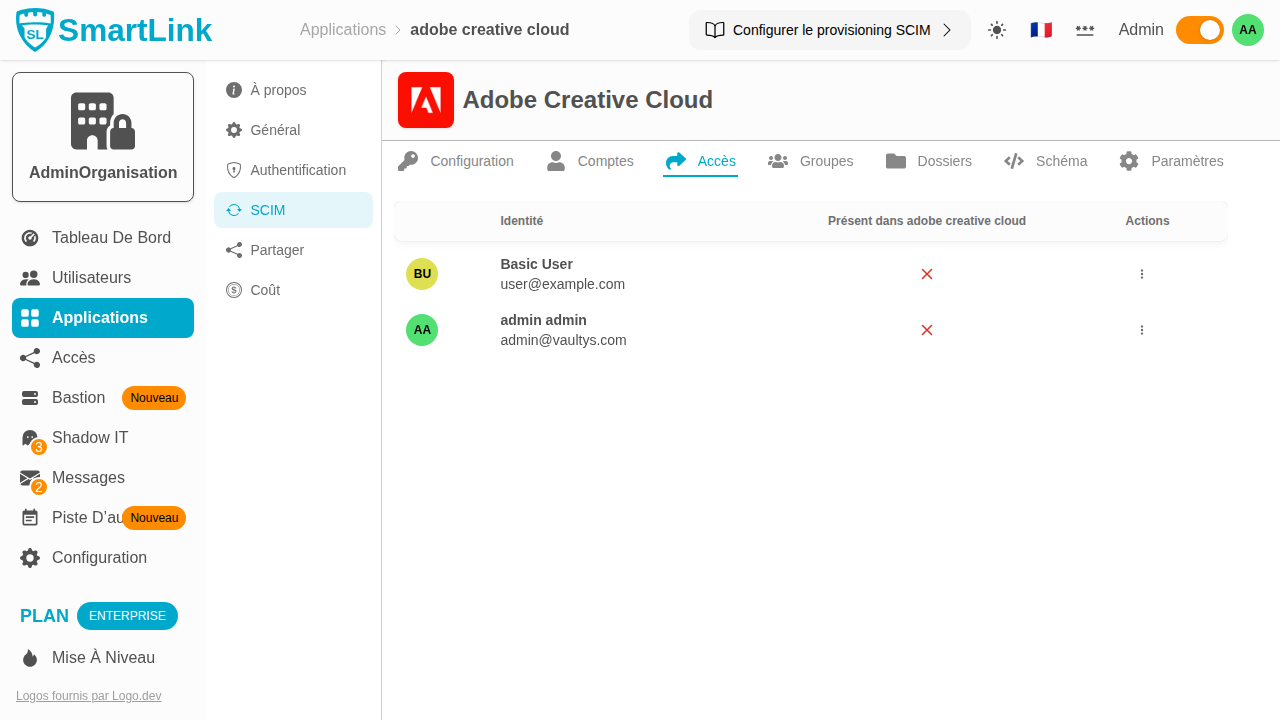
Access
The Access tab lists SmartLink users who have access to this application. The Present in {app} column indicates if a corresponding account exists in the target application.
Available action:
| Action | Description |
|---|---|
| Create an account | Provision an account in the target application for this SmartLink user |
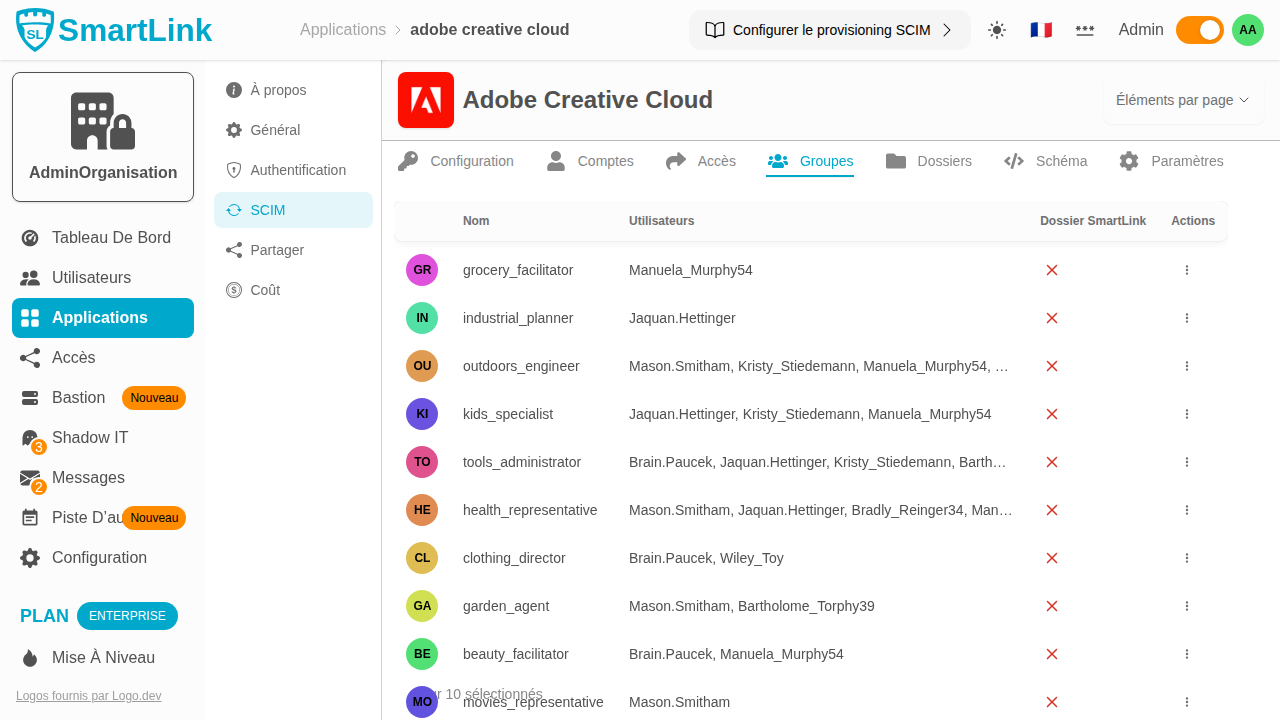
Groups
The Groups tab displays all existing groups in the target application. The SmartLink Folder column indicates if a SmartLink folder is associated with this group.
Available actions:
| Action | Description |
|---|---|
| Create a folder | Create a new SmartLink folder from this group |
| Associate a folder | Associate an existing SmartLink folder with this group |
| Delete | Delete the group in the target application |
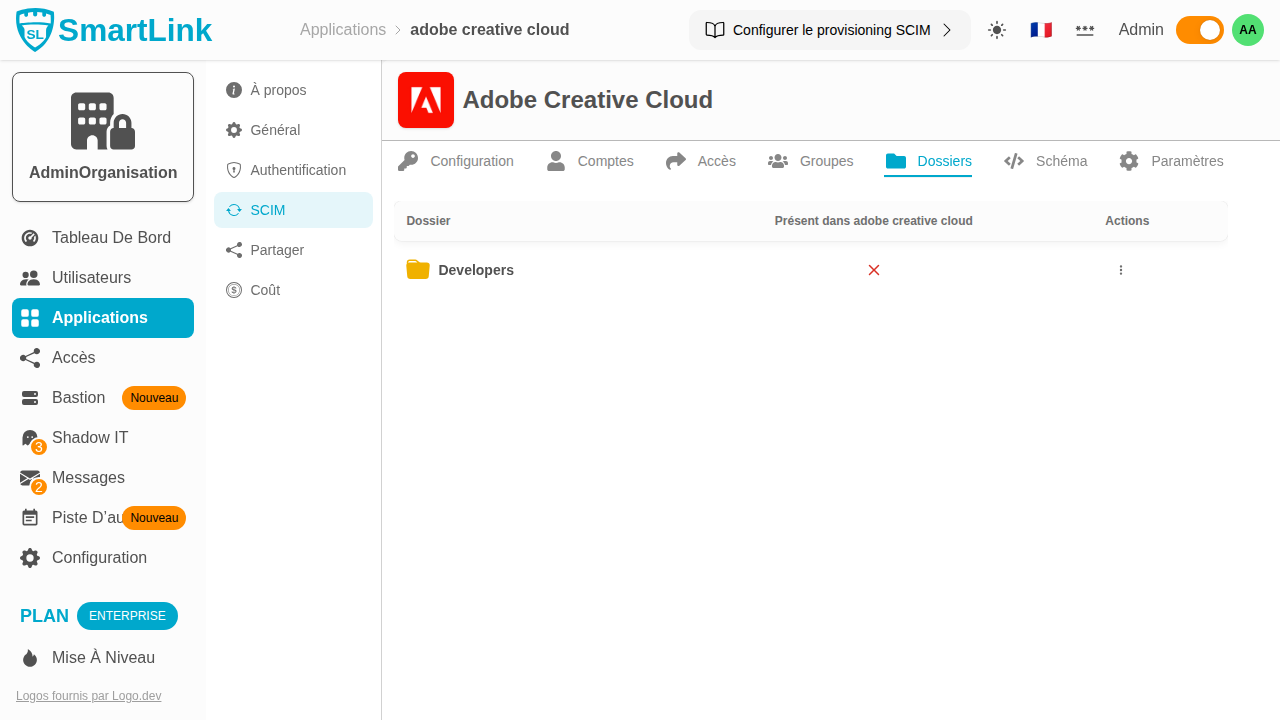
Folders
The Folders tab lists SmartLink folders that contain this application. The Present in {app} column indicates if a corresponding SCIM group exists in the target application.
Available action:
| Action | Description |
|---|---|
| Create a group | Provision a group in the target application for this SmartLink folder |
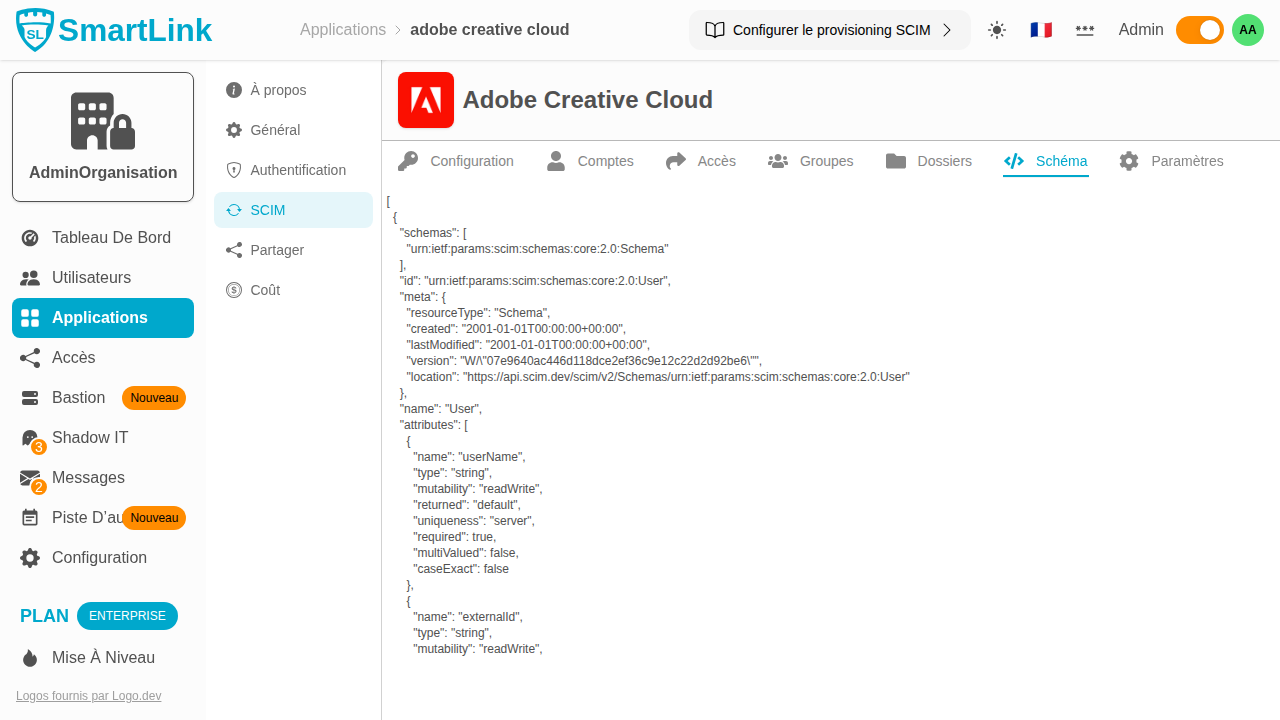
Schema
The Schema tab displays the SCIM schema returned by the target application in JSON format. It lists the attributes available for users and groups, and serves as a reference for configuring mappings.
Settings
The Settings tab allows you to configure SmartLink's automatic behavior during access changes. For each of the four events, you choose between three modes:
| Mode | Behavior |
|---|---|
| Manual | No automatic action - you act from the previous tabs |
| Notification | A ticket is created in SmartLink messaging to guide you |
| Automatic | SmartLink acts directly on the target application without intervention |
The four configurable events:
| Event | Automatic Mode |
|---|---|
| A user gains access to the application | Automatically create an account in the target application (provisioning) |
| A user loses access to the application | Remove the associated account in the target application (deprovisioning) |
| A SmartLink user is deactivated | Deactivate the corresponding account in the target application |
| User metadata is updated | Update the account (name, first name, email...) in the target application |