Create Users
This guide explains how to manually create users in SmartLink.
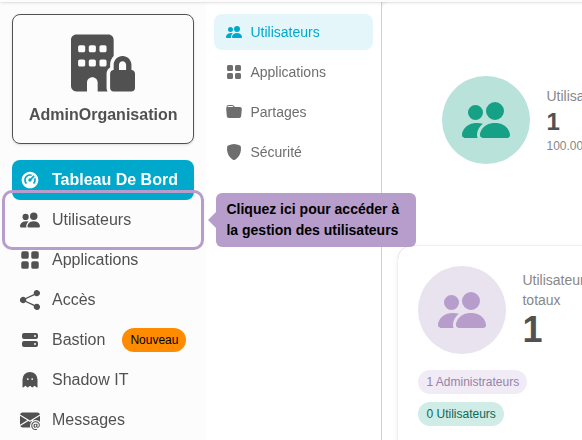
Step 1: Access user management
Go to the Users tab from the admin menu.
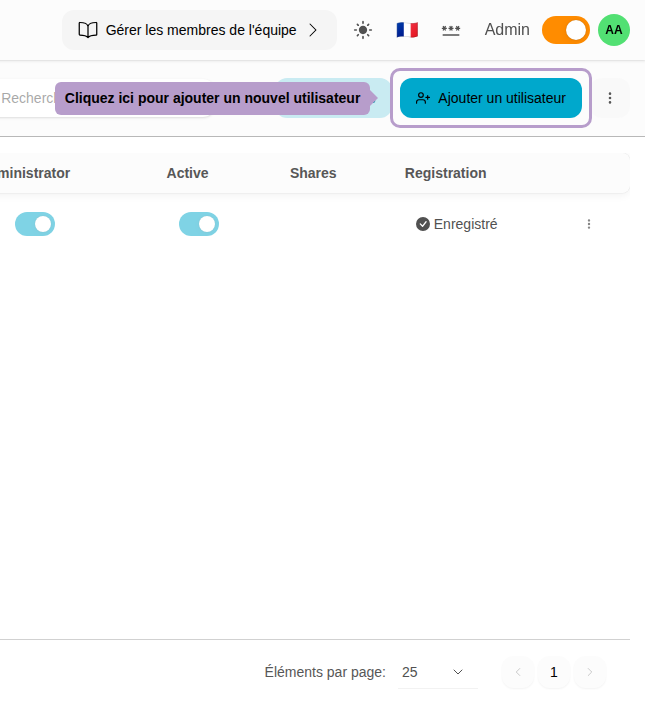
Step 2: Open the creation page
Click on the "Add a user" button in the toolbar to access the creation page. On this page, you can enter the information of the user you want to create. Alternatively, click on the Import button to add multiple users at once via a CSV file.
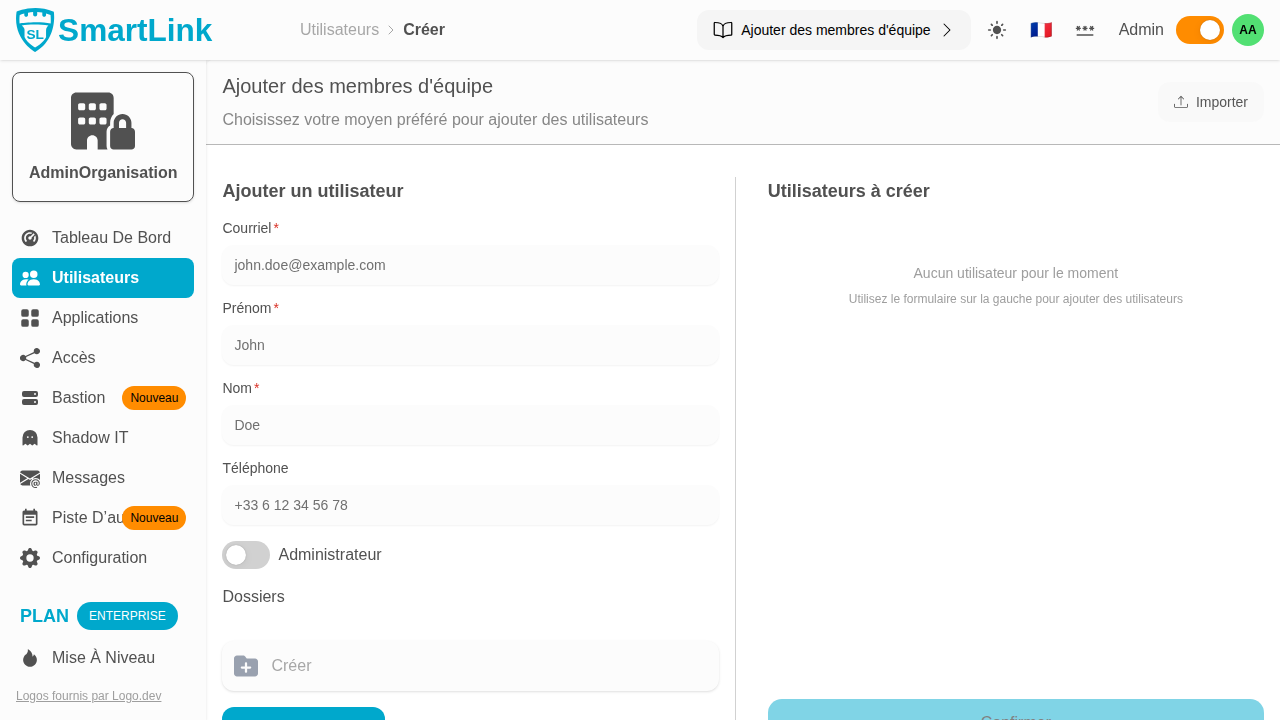
Step 3: Fill out the creation form
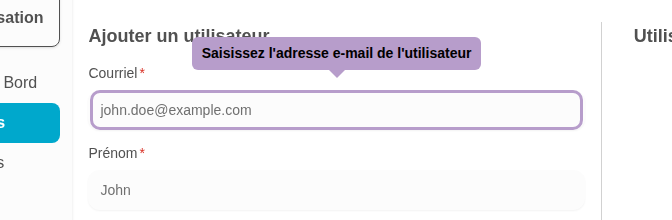
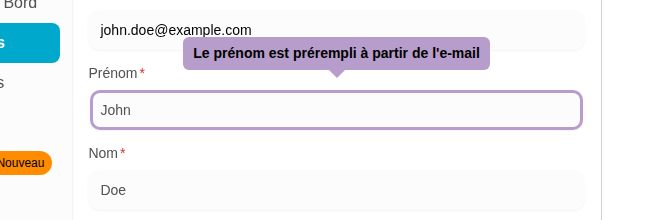
Enter the user's email address. The first name and last name will be automatically suggested from the email, otherwise fill them in manually.
The first name and last name are automatically filled from the email. You can modify them if needed.
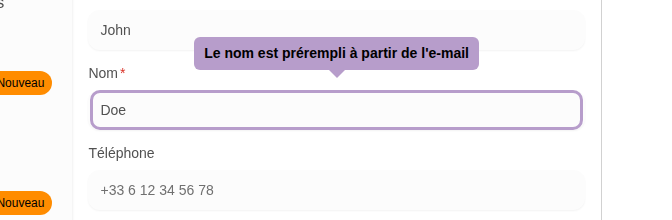
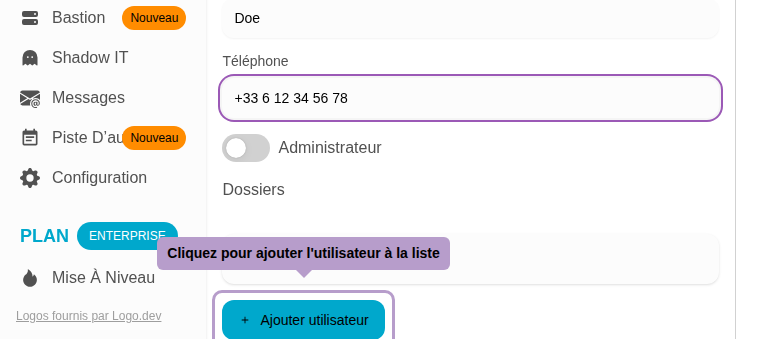
You can, if necessary, enter the user's phone number.
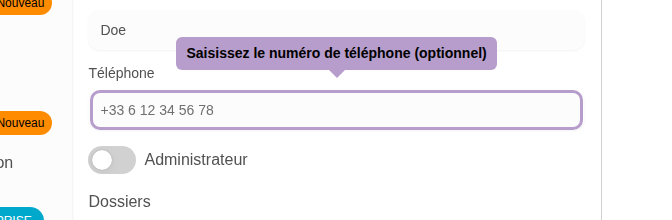
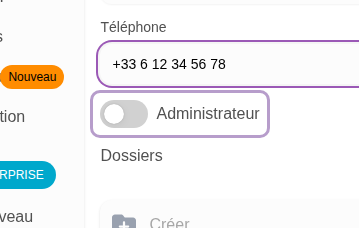
You can assign administrator roles to the user. Administrators have access to all management features in SmartLink.
Step 5: Add the user to the list
Click on the "Add user" button to add them to the pending list on the right.
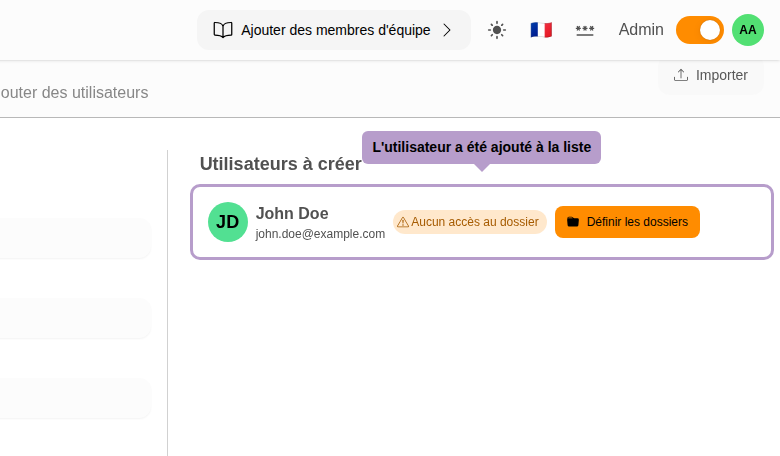
Step 6: Check the list of users
The user now appears in the pending list on the right side of the page. You can add more users or proceed to confirmation.
Step 7: Confirm user creation
Click on the "Confirm" button to create all pending users.

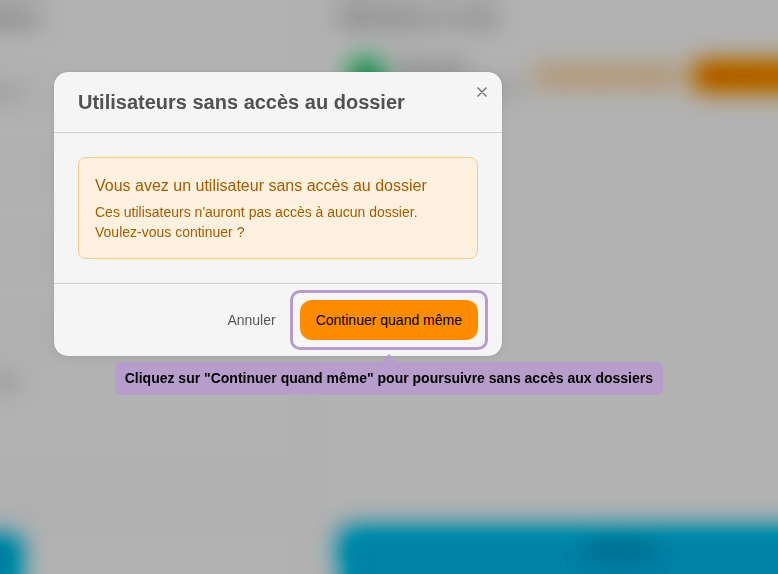
Step 8: Manage folder access warning
If no folder access is configured for users, a warning dialog box will appear. You can choose to continue or go back to assign folders.
Step 10: Verify the user
After confirmation, you will be redirected to the user management page. The new user should appear in the list.
