Create Users
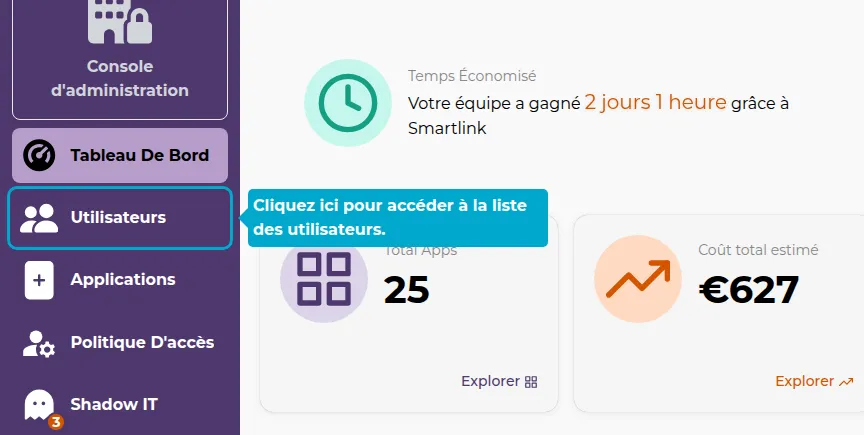
2. Users Page
Click on the Users tab to access the Users page.
2. Add Users Page
Click on the Add button to access the user addition page.

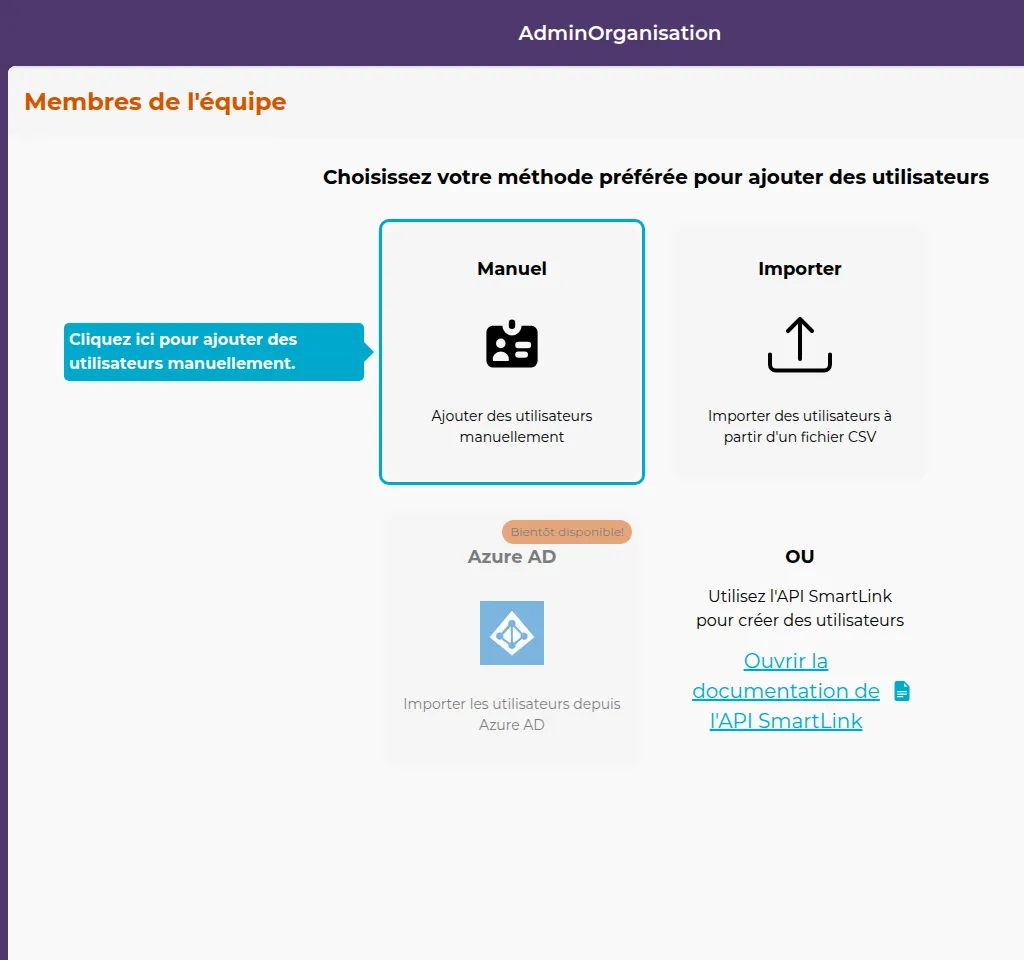
Manual Addition
3. Manual Addition Option
Click on the Manual option to manually add users.
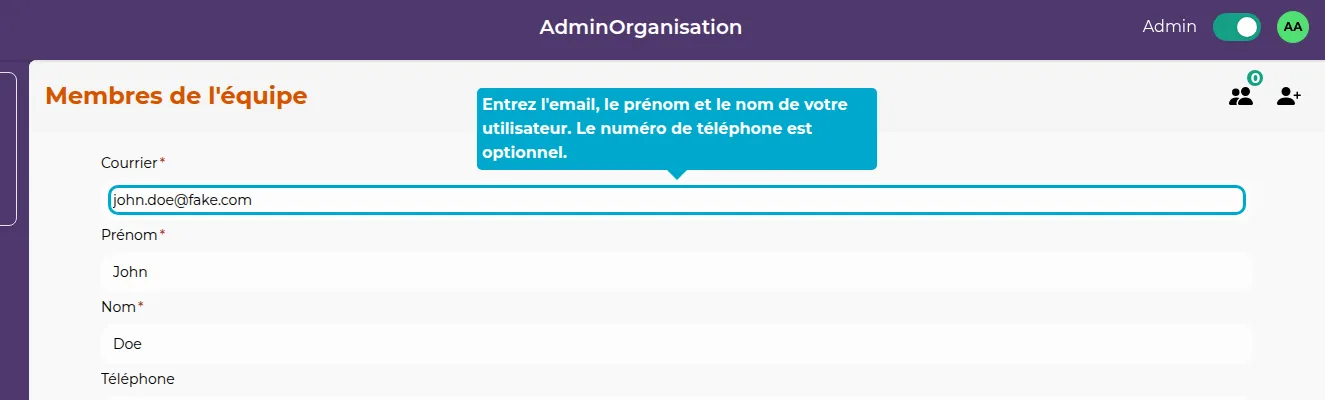
4. User Details
Enter the email, first name, and last name of your user. The phone number is optional.
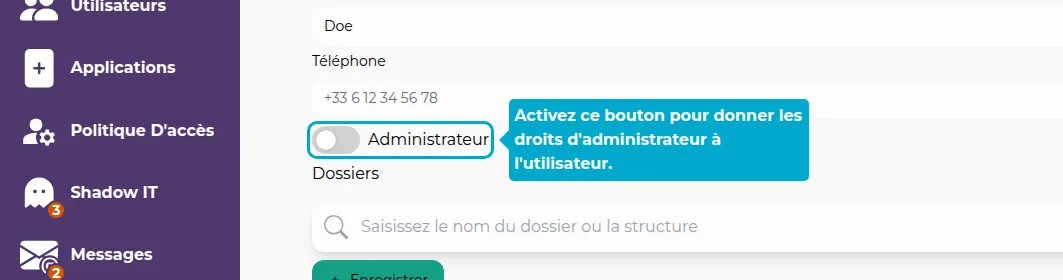
5. Administrator
Click on the Administrator switch if you want to assign administrator rights to this user.
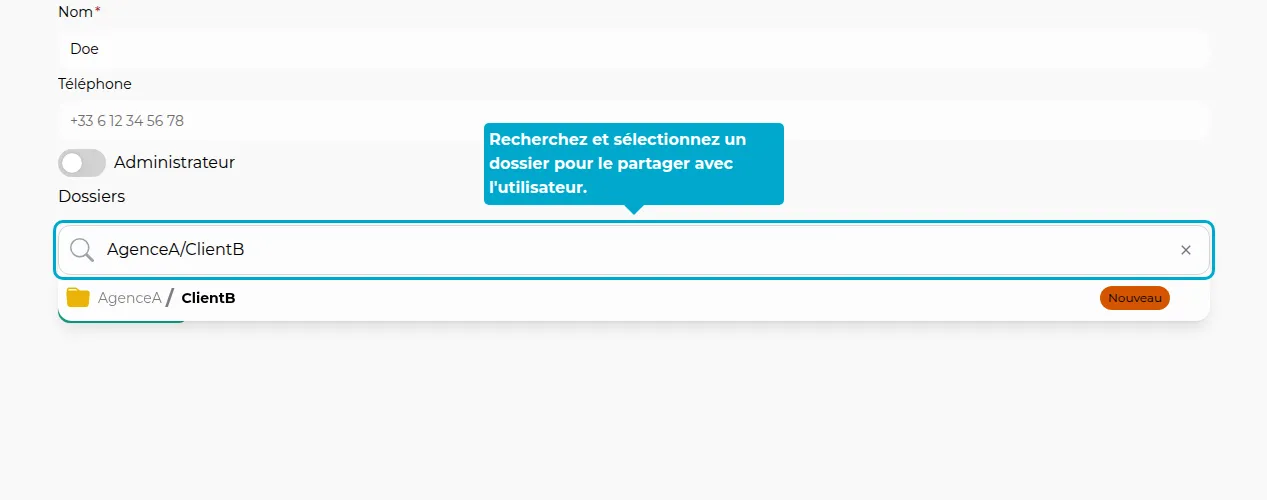
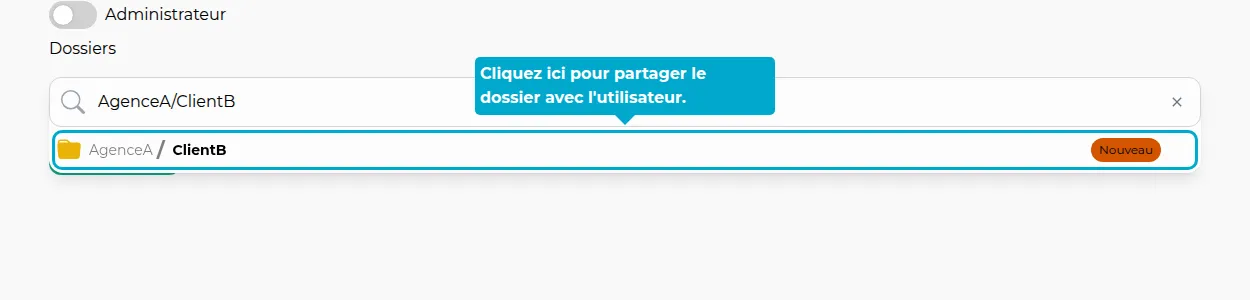
6. Share Folders
You can directly set the folders that this user will have access to. To do this, click on the search bar, search for a folder, and click on it to add. If you enter the name of a folder that does not exist, you have the option to create a new one.
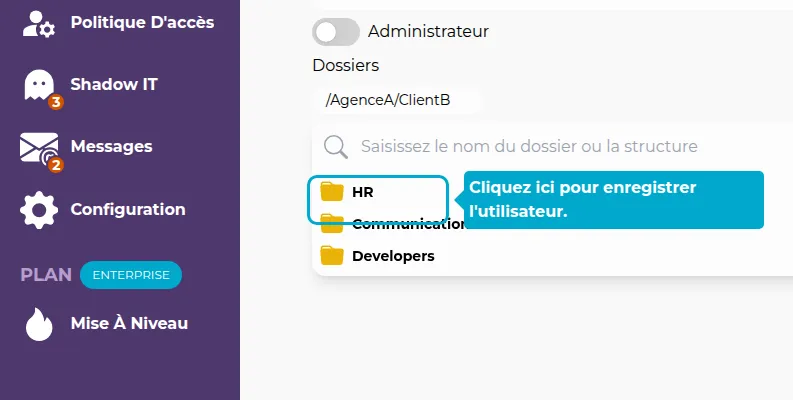
7. Validate User
Click on the Save button to validate the user. They will then be added to your list of current users.
Import
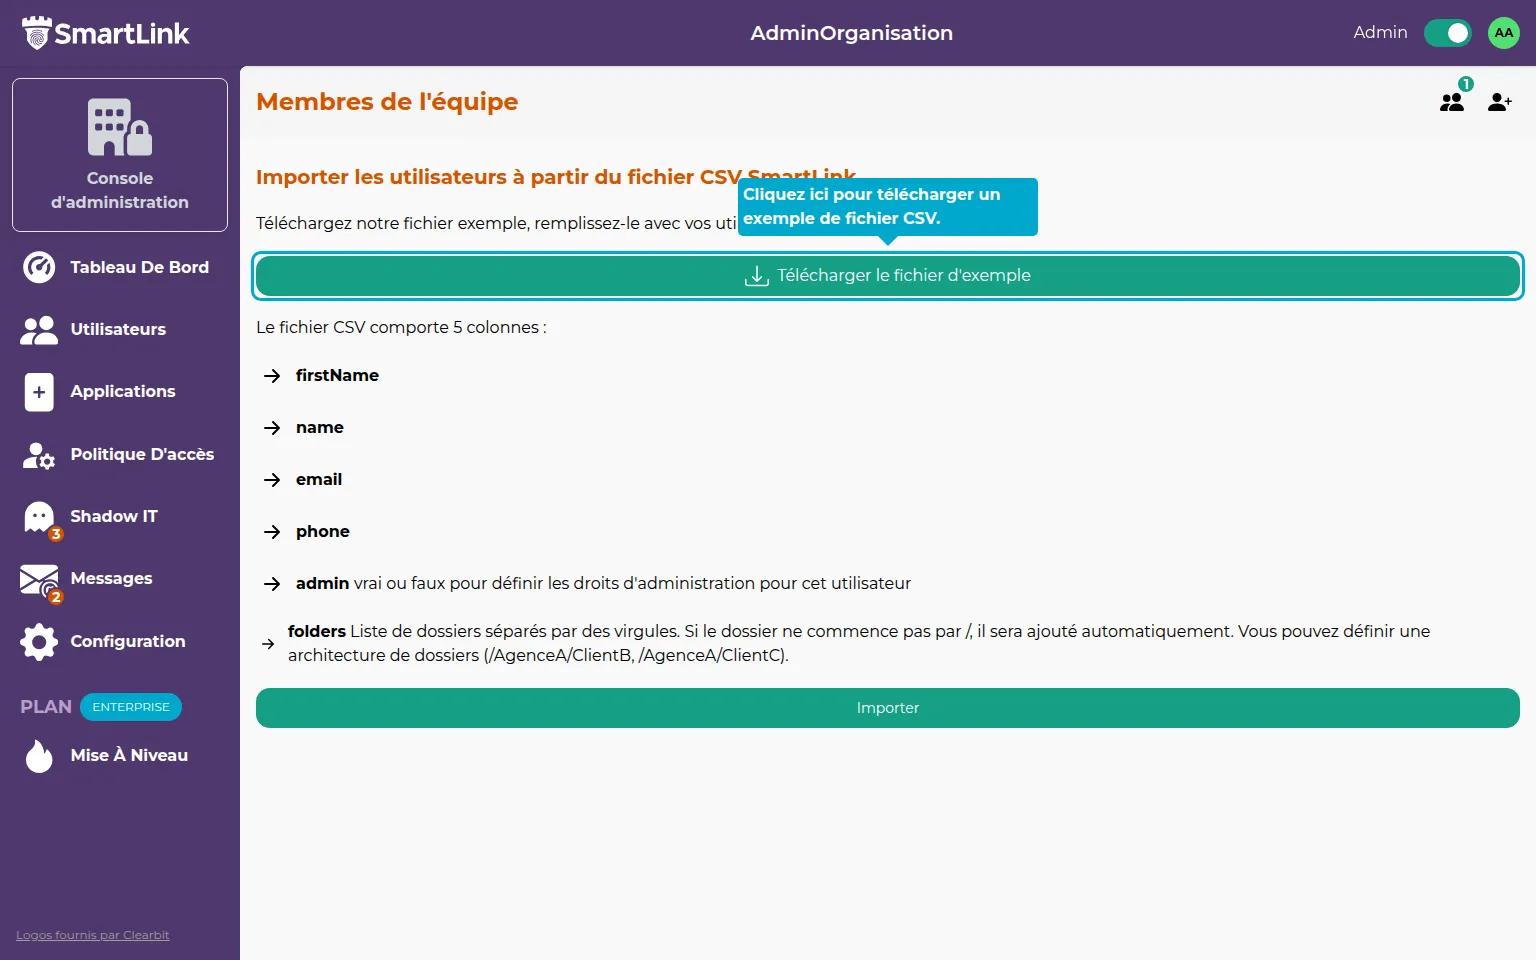
8. Add via CSV File
You can import a list of users directly via a CSV file. To do this, choose the Import option.

9. Example
Click to download an example CSV file. Fill this file with your own data.
10. Import
To import a file, click on the Import button and select your file. The users will then be added to your list of current users.

Validate
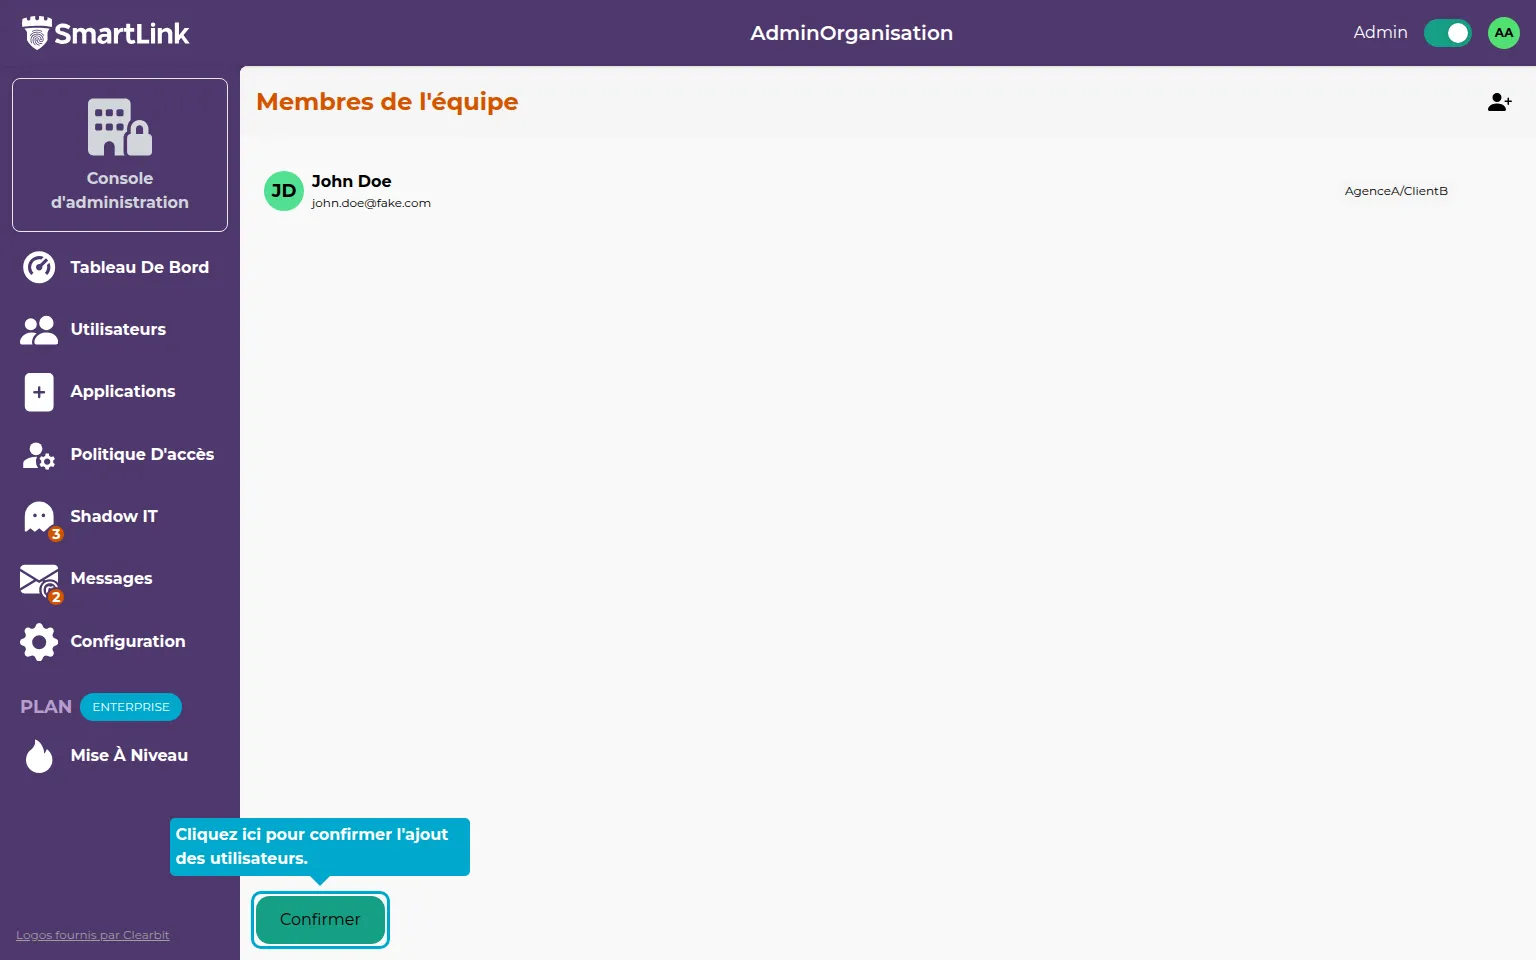
⚠️ Confirm User List
At this stage, your users have not been added to the SmartLink, but to a queue that you can review and validate to add them to the SmartLink.
11. Access the List
Click on the button to access the list of users currently being created.

12. Confirm
The list of users ready to be created is displayed. Check the information. You can optionally edit folder shares or remove users.
Click Confirm to add the users to your SmartLink.